이전 게시글을 통하여 ELK를 설치하는 과정에 대해서 알아보았다.
[ELK Stack] 로그 시스템을 구축하기 위한 ELK를 설치해보자
1. ELK Stack 이란 ? ELK 는 오픈소스 프로젝트인 (Elastic search, LogStash, Kibana)의 앞글자만 따서 만들어진 용어이다. ElasticSearch : LogStash를 통해서 전송받은 데이터 분석 및 저장 기능을 담당한다.L..
potato-yong.tistory.com
이번 글에서는 ELK를 구축한 서버와는 별도로 다른 리눅스 서버에서 filebeat를 설치하고 로그를 실시간으로 수집하여 대시보드로 확인하는 과정에 대해서 알아보도록 하자
1. Filebeat 설치하기
우선 로그를 수집할 대상 리눅스 서버에 Filebeat를 설치하여 데이터를 수집해보자.
# filebeat 설치하기

$ curl -L -O https://artifacts.elastic.co/downloads/beats/filebeat/filebeat-7.14.0-x86_64.rpm
$ sudo rpm -vi filebeat-7.14.0-x86_64.rpm
# filebeat 실행하기

$ systemctl start filebeat
$ systemctl enable filebeat
filebeat 설치가 제대로 되었으면 filebeat.yml 파일을 통해 설정을 해줘야 한다.
# filebeat.yml 설정

$ vi /etc/filebeat/filebeat.yml

# ============================== Filebeat inputs ===============================

filebeat.inputs:

# Each - is an input. Most options can be set at the input level, so
# you can use different inputs for various configurations.
# Below are the input specific configurations.

- type: log

  # Change to true to enable this input configuration.
  enabled: ture    # false 라고 되어있는 것을 true로 변경해준다

  # Paths that should be crawled and fetched. Glob based paths.
  paths:
    - /var/log/*.log   # 해당 리눅스 서버에 /var/log/*.log 로 시작하는 부분에 대한 데이터를 수집한다.
    #- c:\programdata\elasticsearch\logs\*
수집한 데이터는 Logstash를 통해서 전달하기 위해서 Elasticsearch는 주석처리하고 Logstash를 활성화 해주자.
# filebeat.yml 설정

$ vi /etc/filebeat/filebeat.yml


# ---------------------------- Elasticsearch Output ----------------------------
# output.elasticsearch:
  # Array of hosts to connect to.
  # hosts: ["localhost:9200"]

  # Protocol - either `http` (default) or `https`.
  #protocol: "https"

  # Authentication credentials - either API key or username/password.
  #api_key: "id:api_key"
  #username: "elastic"
  #password: "changeme"

# ------------------------------ Logstash Output -------------------------------
output.logstash:
  # The Logstash hosts
  hosts: ["<ELK-ip>:5044"]

  # Optional SSL. By default is off.
  # List of root certificates for HTTPS server verifications
  #ssl.certificate_authorities: ["/etc/pki/root/ca.pem"]

  # Certificate for SSL client authentication
  #ssl.certificate: "/etc/pki/client/cert.pem"

  # Client Certificate Key
  #ssl.key: "/etc/pki/client/cert.key"
filebeat.yml 파일에서 설정한 부분을 적용시키기 위해서 filebeat를 재시작 해주자.
# filebeat.yml 설정 적용

$ systemctl restart filebeat
2. Kibana에서 로그 확인
Filebeat 설치와 설정을 끝마쳤다면 Kibana에 접속해서 로그를 받아오는지 확인해보자.
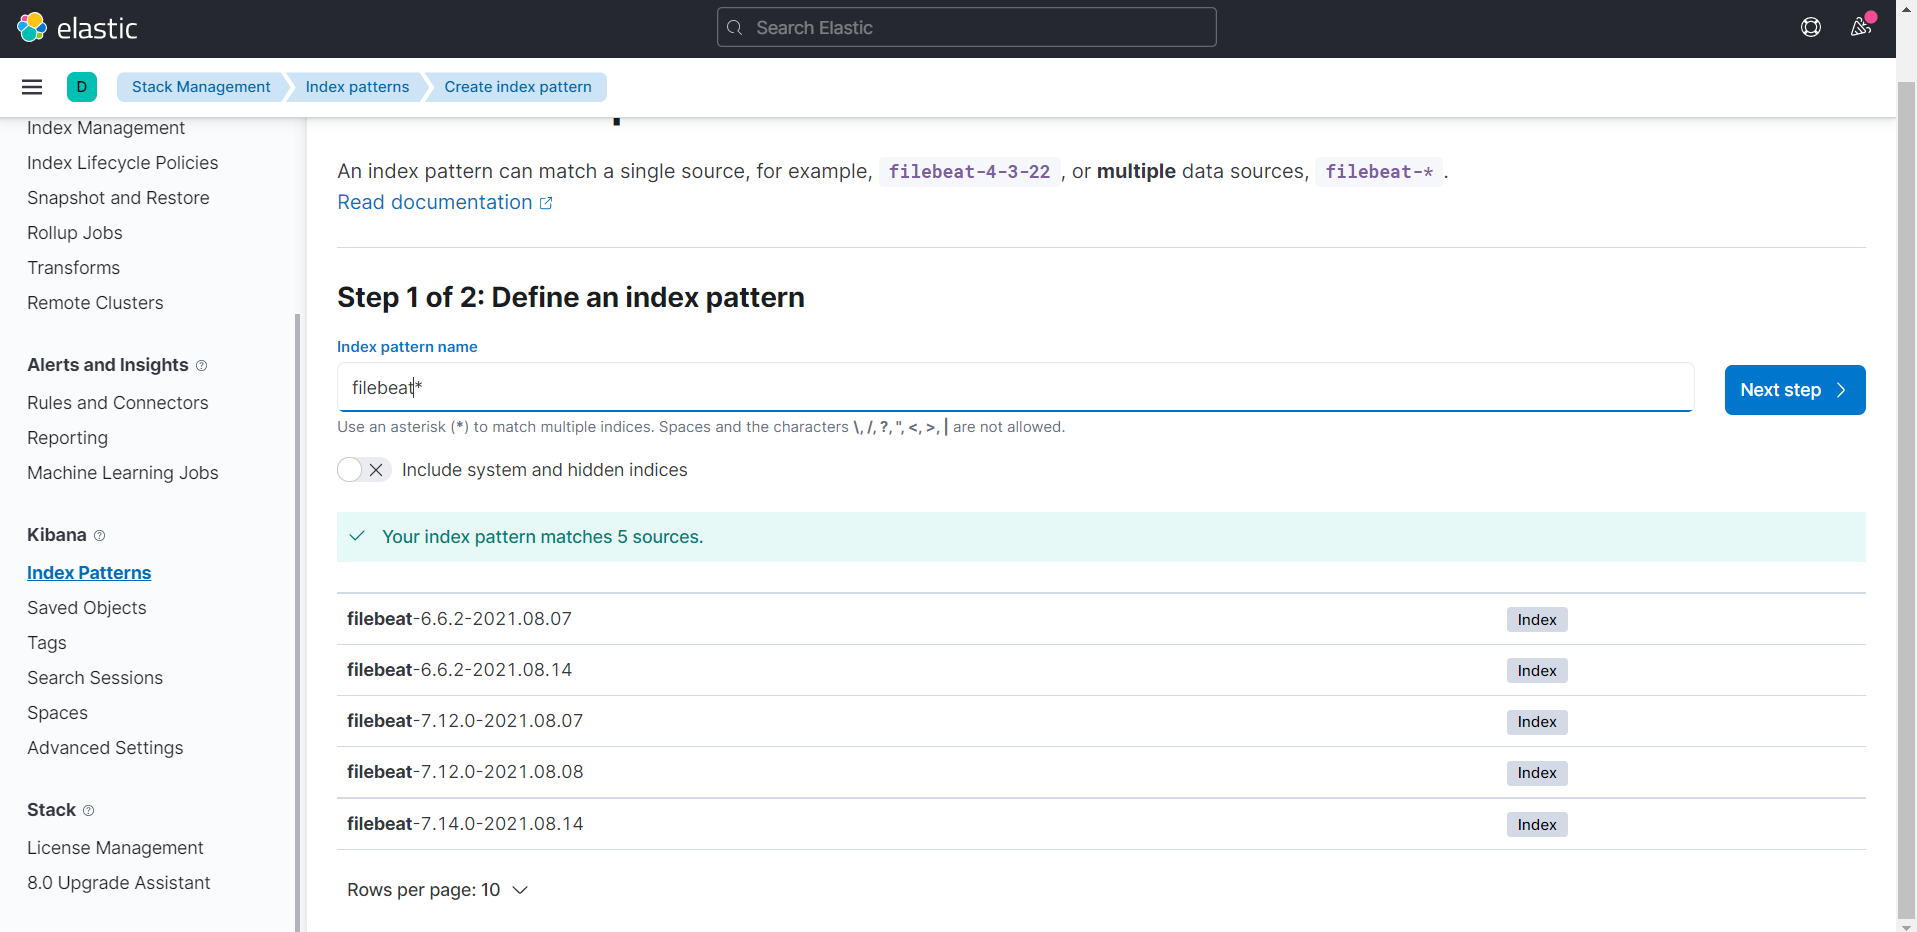
Kibana의 왼쪽 상단 메뉴창에서Management (Stack Management) > Kibana (Index pattern) > Create index pattern 를 눌러주자

Index pattern name 에 filebeat*를 입력해보면 위에서 설치했던 filebeat-7.14.0 버전이 목록에 있는것을 확인할 수 있다.

Time field 부분에 @timestamp를 선택해주고 index pattern 을 생성해주자.

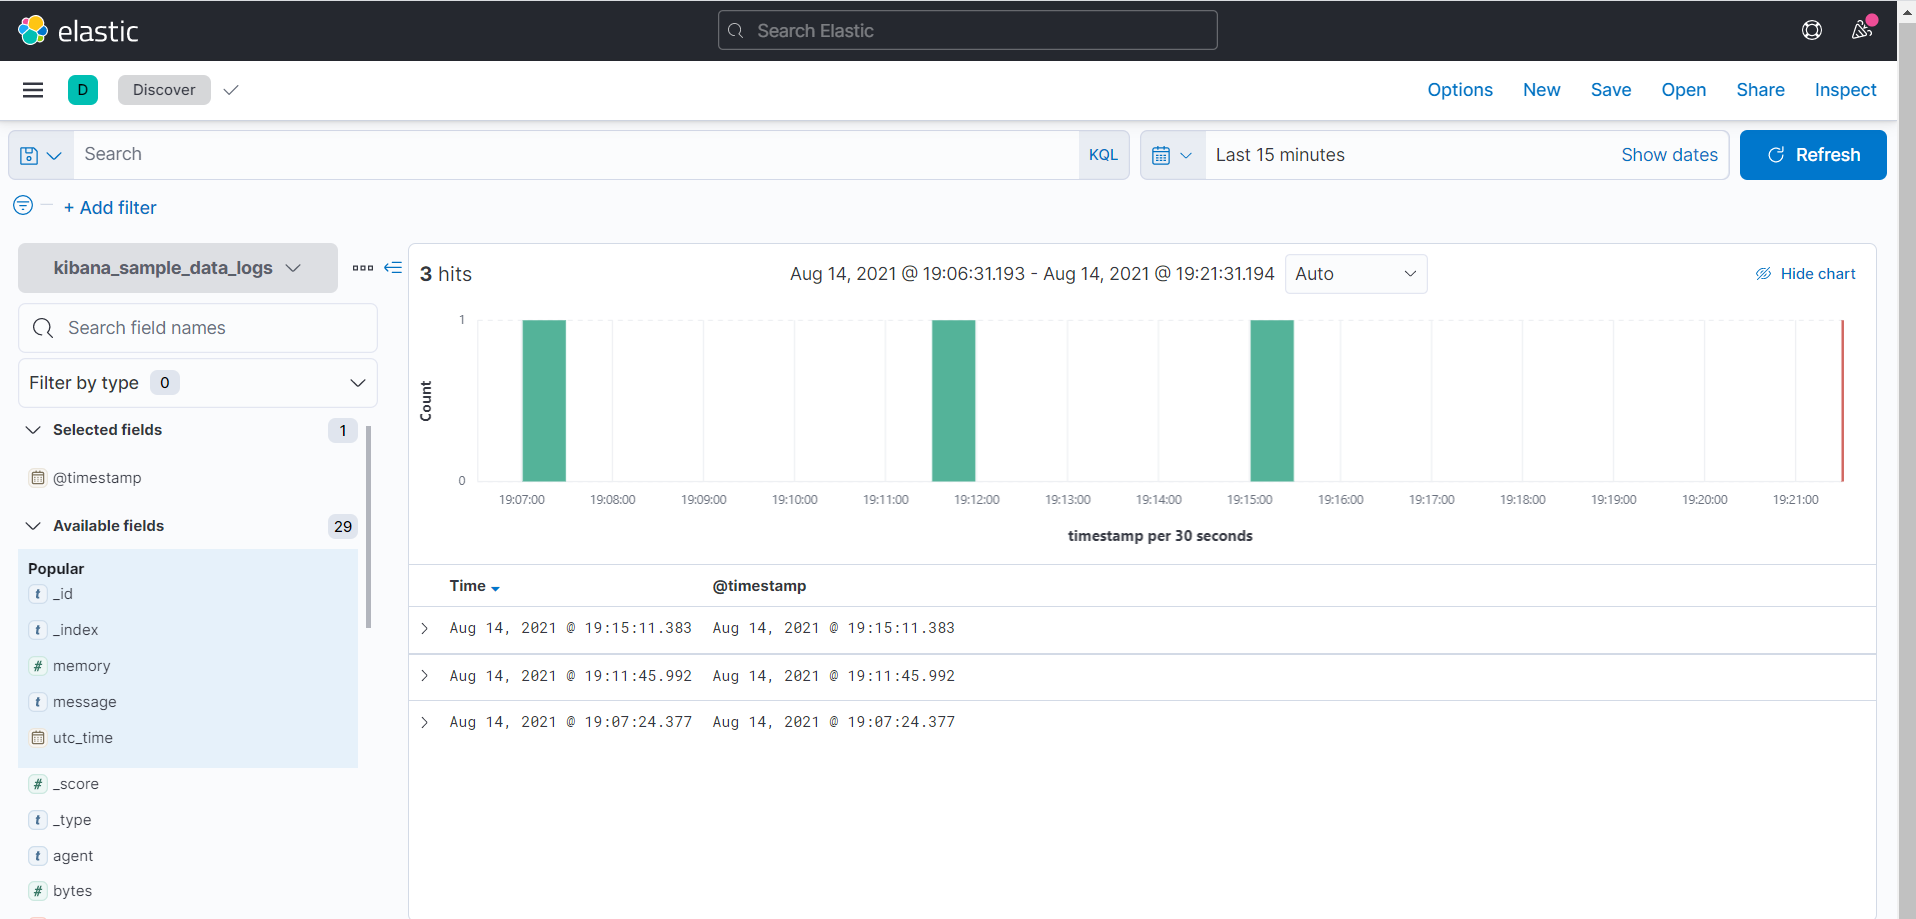
Index pattern이 생성됐으면 Analytic > Discover 메뉴에서 다음과 같이 확인할 수 있다.
왼쪽 메뉴에서 field를 선택하여 원하는 부분만 볼수도 있고, 오른쪽 상단에서 원하는 시간을 지정할 수도 있다. 사진에서는 15분 전의 로그들만 가져오도록 되어있다.

대상 리눅스 서버의 /var/log/*.log 파일들을 제대로 수집하고 있는지 확인하기 위해서 php 를 설치해서 로그를 확인한 후

Kibana에서 살펴보니 실시간으로 php 설치 로그가 찍히는것을 확인할 수 있다.

'DevOps > Logging' 카테고리의 다른 글
| [ELK Stack] 로그 시스템을 구축하기 위한 ELK를 설치해보자 (0) | 2021.08.07 |
|---|
